Quick build selector
Choose a Build From the Last Failed Run
Pick the symptom that best matches what happened. Development level can outweigh a theoretical perfect setup, so use the substitution rule when one required piece is weak.
No single clear weakness
Use the balanced general route.
CROWDSEnemies close every lane
Use maximum coverage and range.
BOSSWaves clear, boss survives
Shift one slot toward focused damage.
SURVIVALNormal mistakes end the run
Use a safer first-clear setup.
FARMINGThe stage is already easy
Add resource stats without losing clear speed.
LOW INVESTMENTRecommended pieces are underleveled
Build around the account's strongest cards.
MIXED STAGEBoth waves and boss are difficult
Use two coverage jobs and one finisher.
MOBILITYTerrain or projectiles trap you
Prioritize range, speed and uptime.
Quick answer
Eight App Builds at a Glance
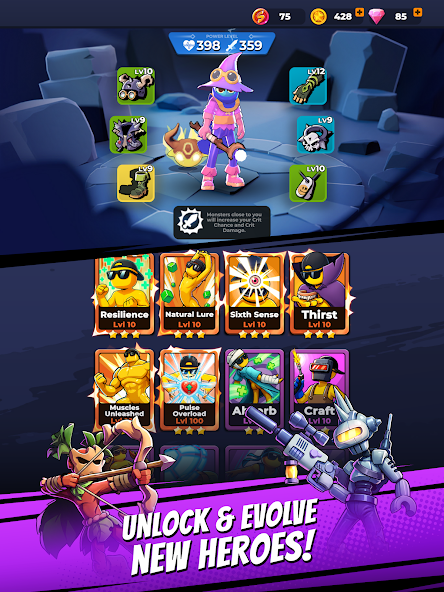
The hero labels below use names and trait cards visible in the App. For unnamed heroes, match the trait shown on your current hero card before investing.
| Build | Hero Target | Weapons | Gear Stats | Skill Priority | Best Map Use |
|---|---|---|---|---|---|
| Balancio Gunslinger Best general route |
Balancio with Swift and Gunslinger upgrades | Pistol + Shotgun + Plasma Beam or Chain Lightning | Attack Speed → Damage → Range → Speed/Dodge | Gunslinger → Swift → Damage → Range → HP Restore | Frightful Foothills, first clears, unknown layouts |
| Horde Clearer Maximum coverage |
Pulse Overload or another ranged/offense hero card | Plasma Beam + Chain Lightning + Shuriken; Sniper flex | Attack Speed → Range → Damage → Pickup Range | Attack Speed → Damage → Range → Speed | Dense horde maps and open layouts with enemies from several directions |
| Boss Hunter Focused damage |
Sixth Sense or another damage-focused hero card | Sniper + Shotgun + Pistol; one Plasma Beam coverage slot | Crit Chance → Crit Damage → Damage → Attack Speed/Dodge | Damage → Crit → Attack Speed → Speed | Boss stages and runs where one durable enemy is the wall |
| Safe Progression First-clear consistency |
Resilience or Absorb hero card | Plasma Beam + Chain Lightning + Pistol or Shotgun | Max HP → Dodge → Armor/Shield → HP Restore | Survival stat → Damage → Speed → Recovery | Obstacle-heavy maps, projectile pressure and unfamiliar stages |
| XP & Resource Account growth |
Natural Lure or a utility-focused hero card | Chain Lightning + Plasma Beam + Pistol or Shuriken | XP Gain → Pickup Range → Luck/Speed → baseline Damage | XP Gain → Pickup Range → Speed → Damage | Earlier repeatable maps; avoid using it for a difficult boss push |
| Highest-Development Starter Lowest investment risk |
The hero with the strongest current levels, cards and matching gear | Best-developed crowd weapon + focused weapon + reliable flex | Damage → Attack Speed → the hero's existing useful stats | Main weapon → broad offense → one safety answer | Fresh accounts and accounts missing several recommended pieces |
| Mixed Boss & Horde Two-phase stages |
A developed general or offense card without a narrow utility lock | Plasma Beam + Chain Lightning/Pistol + Sniper/Shotgun | Damage → Attack Speed → Range → Crit or Dodge | Coverage first → focused damage → one safety stat | Stages where dense waves lead into a durable boss or elite |
| Mobility & Projectile Damage uptime |
Swift, Dodge, shield or another movement/safety-supporting card | Plasma Beam + Sniper/Pistol + Chain Lightning or Shuriken | Range → Speed → Dodge → Damage/Attack Speed | Range → Speed → Damage → one recovery option | Obstacle-heavy, projectile-heavy and narrow-route maps |
Build anatomy
What Makes a Complete Build?
A weapon list is not a build. The five layers must answer the same problem.
Rule: change one layer after a failed run, not all five.
Hero
Provides the starting trait, upgrade path and risk profile.
Weapons
Cover crowds, focused targets and one flex or protection role.
Gear
Raises the stats that make the weapon plan work; item effect matters more than a fashionable set name.
Skills
Fix the current bottleneck instead of spreading levels across unrelated stats.
Map
Determines whether coverage, range, speed, burst or durability deserves the final slot.
Full setups
Eight App Builds and Their Replacements
Balancio Gunslinger
Best all-purpose progression build
Balancio. Swift adds Speed and Gunslinger adds Attack Speed in the visible App upgrade path.
Pistol + Shotgun + Plasma Beam. Swap Chain Lightning for Plasma when scattered enemies are the problem.
Attack Speed, Damage and Range first; add Dodge or HP Restore when mistakes chain into a loss.
Gunslinger → Swift → Damage → Range. Do not overbuy recovery while clear speed is weak.
Frightful Foothills and general first clears. Replace Shotgun with Sniper for a boss wall.
Horde Clearer
Best when the screen fills faster than you kill
Use a ranged/offense card such as Pulse Overload, then confirm the current card effect before spending.
Plasma Beam + Chain Lightning + Shuriken. Keep Sniper or Shotgun as the focused slot.
Attack Speed, Range and Damage; Pickup Range is useful only after the damage baseline is stable.
Attack Speed → Damage → Range → Speed. Avoid filling every slot with another crowd weapon.
Open or dense horde layouts. Add Speed for obstacle routes and Sniper for a boss finish.
Boss Hunter
Best when regular waves are easy but the boss survives
Choose a damage-focused card such as Sixth Sense; use the current description to confirm its benefit.
Sniper + Shotgun + Pistol. Keep one Plasma Beam slot so normal enemies do not close the arena.
Crit Chance, Crit Damage, Damage and Attack Speed; add Dodge if close burst is unsafe.
Damage → Crit → Attack Speed → Speed. Drop a luxury stat for survivability if one hit ends the attempt.
Boss stages. Replace Shotgun with Chain Lightning when the fight also produces heavy crowd pressure.
Safe Progression
Best for unfamiliar maps and difficult first clears
Use a Resilience or Absorb card and read the current effect before choosing between health and shield gear.
Plasma Beam + Chain Lightning + reliable Pistol. Add Shotgun only when close threats remain the failure.
Max HP, Dodge, Armor or Shield, then HP Restore. Keep enough Damage to prevent endless crowd growth.
One survival upgrade → Damage → Speed → Recovery. Do not stack defense after the run is already safe.
Obstacle-heavy, projectile-heavy or unknown stages. Shift one defensive slot to Crit after the first clear.
XP & Resource Growth
Best for repeatable content, not a progression wall
Choose Natural Lure or another utility card only after checking the current card text.
Chain Lightning + Plasma Beam + Pistol or Shuriken for low-risk coverage.
XP Gain, Pickup Range, Luck and Speed after a minimum Damage and Attack Speed baseline.
XP Gain → Pickup Range → Speed → Damage. Stop adding economy if waves begin to outscale you.
Earlier repeatable maps such as Frightful Foothills. Switch to Boss Hunter when pushing a hard gate.
Highest-Development Starter
Best when the account lacks the named pieces above
Use the hero with the strongest current level, useful visible abilities and supporting equipment. Development wins until a replacement is ready.
Choose the best-developed crowd weapon, best-developed focused or close weapon and one reliable flex. Do not force three low-rank recommendations.
Keep coherent Damage and Attack Speed value, then preserve the safety stats already supported by keeper items.
Main weapon → Damage/Attack Speed → missing role → one survival fix. Delay narrow economy or specialist stats.
Early progression, fresh accounts and any period when replacing the main setup would reset too much useful investment.
Mixed Boss & Horde
Best when waves and the final durable target are both real checks
Use a developed general or offense card. Avoid a narrow farming card when both phases require combat output.
Plasma Beam for lanes + Chain Lightning or Pistol for stable coverage + Sniper or Shotgun as the finisher.
Damage and Attack Speed first, enough Range for waves, then Crit or Dodge according to the boss failure.
Coverage baseline → focused damage → one safety answer. Do not fully optimize for phase one and arrive helpless at phase two.
Dense stages ending in a boss, elite-heavy routes and unknown content where pure specialization is risky.
Mobility & Projectile
Best when movement and damage uptime matter more than stationary burst
Use Swift, Dodge, shield or another currently visible card that supports movement, spacing or surviving projectile pressure.
Plasma Beam for persistent lanes + Pistol or Sniper for ranged uptime + Chain Lightning or Shuriken for mobile coverage.
Range and Speed first, then Dodge, Damage and Attack Speed. Add recovery only when chip damage accumulates.
Range → Speed → Damage → Dodge/recovery. Avoid close-range commitment unless it answers a specific threat.
Narrow routes, obstacle-heavy stages, projectile pressure and fights where stopping to attack repeatedly causes damage.
Map adjustment
Choose the Build by Map Layout
| Map Situation | Best Build | Add | Remove or Delay |
|---|---|---|---|
| Frightful Foothills / early progression | Balancio Gunslinger | Balanced coverage and Speed | Deep Crit or economy investment |
| Dense open horde map | Horde Clearer | Plasma Beam, Chain Lightning, Range | Redundant single-target slots |
| Boss or elite damage gate | Boss Hunter | Sniper, Crit, focused Damage | Third crowd weapon |
| Obstacle or parkour-heavy layout | Safe Progression | Speed, Range, Dodge | Close-range commitment |
| Known easy repeatable stage | XP & Resource | XP Gain, Pickup Range, Luck | Extra defense that does not improve consistency |
| Unknown new map | Safe Progression → adapt | One coverage, one focused and one survival answer | Specialist build before learning the layout |
| Recommended cards are underleveled | Highest-Development Starter | Strongest current crowd, focused and flex pieces | Resetting useful investment for a theoretical list |
| Dense waves followed by a boss | Mixed Boss & Horde | Two reliable coverage jobs and one finisher | Pure crowd or pure boss specialization |
| Narrow routes and projectile pressure | Mobility & Projectile | Range, Speed, Dodge and ranged uptime | Stationary close-range commitment |
Fix the Build That Failed
- Crowded out: add Plasma Beam, Chain Lightning, Range or Attack Speed.
- Boss survives: add Sniper, Crit or focused Damage; remove a duplicate coverage weapon.
- One hit ends the run: add Max HP, Dodge, Armor/Shield or HP Restore.
- Cannot collect safely: add Speed, Pickup Range or ranged coverage.
- Build never comes online: reduce economy and upgrade the current main weapon.
Resource Order Before a Hard Push
- 1. Permanent baseline: enough broad power to make the run viable.
- 2. Main weapon: upgrade the crowd or focused weapon used in most attempts.
- 3. Keeper gear: invest in stats that support the chosen build.
- 4. Specialist hero: deepen the hero only after the build has a clear use case.
- 5. Second build: create it after the primary push setup is stable.
Avoid broken synergies
Common App Build Mistakes
Copying browser characters and maps
The VOODOO App uses a different roster, weapon list and progression loop.
Calling three weapons a build
Hero traits, gear stats, skills and map layout determine whether the weapons can perform their jobs.
Using every slot for crowd clear
The setup feels strong until a boss or elite exposes the missing focused-damage role.
Forcing an unconfirmed gear set
Choose the item effect and stats shown in the current Gear screen instead of sacrificing keepers for a name.
Ranking stats without the map
Range, Speed, Crit and durability change value when obstacles, projectiles or bosses change.
Building a second setup too early
Splitting weapon, hero and gear resources can leave both builds unable to pass the current wall.
Monster Survivors App Build FAQ
What is the best general build?
Use the strongest developed general hero with one crowd weapon, one focused or close weapon and one reliable flex weapon. Prioritize Damage and Attack Speed, then add the Range, Speed or survivability required by the current map.
Which stats should gear provide?
Use Damage and Attack Speed for general clear, Range and Speed for safety, Crit for bosses, and Max HP, Dodge, Armor, Shield or HP Restore for difficult first clears.
Should I use one build on every map?
No. Dense maps reward coverage, bosses need focused damage, obstacle layouts increase the value of Speed and Range, and unknown maps should be approached with a safer balanced setup.
When should I switch away from an XP build?
Switch when enemies begin to outscale the build, a boss becomes the gate or economy stats force you to remove a required damage or survival slot.
What if I do not have the recommended hero or weapon upgraded?
Keep the same crowd, focused, flex and safety jobs, but use the strongest developed alternatives on your account. Replace one slot at a time only when the new option can perform the same job immediately.
Does this guide cover Play Online?
No. This page covers the VOODOO App. The site's online game is a separate title with different builds.
Build the Next Layer
Use the guide that matches the decision currently blocking the setup.
App Best Weapons
Choose crowd, boss and flex weapon roles.
Weapon Combos
Assemble complementary weapon roles and swap only the weak link.
Best Gear
Match equipment stats to the build goal before enhancing a keeper.
App Upgrades
Decide between permanent power, Cores and keeper gear.
Gilded Cores
Farm and spend Cores for the build that actually blocks progress.
Heroes Tier List
Compare hero cards, development and map roles.
App Wiki
Find the right guide for every connected build system.